Please select the MoSaleen™ Idler Pulley System you wish to install:
Installation Instructions for 99-04 Saleens
NOTE to 2002 Saleen Owners: Please read the amendment for 2002 models (listed in the drop down menu below) before beginning installation.
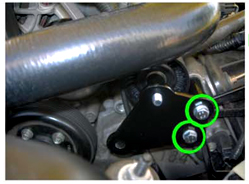
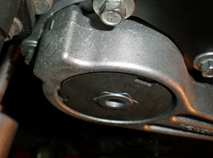
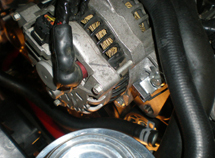
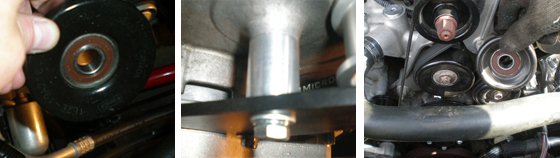
Step 1:
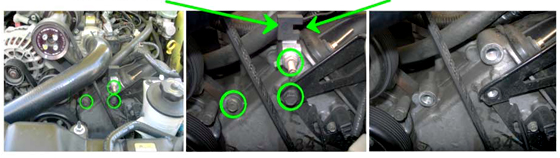
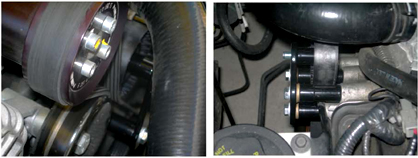
Remove the three bolts shown below. They will need to be relocated in order to install the bracket.
Step 2:
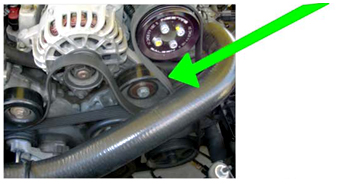
Loosen and remove the belt from the smooth pulley.
Step 3:
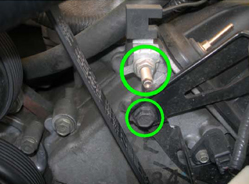
Use the new bolts and spacers to attach the bracket to the engine. Install the two bolts and spacers indicated below first.
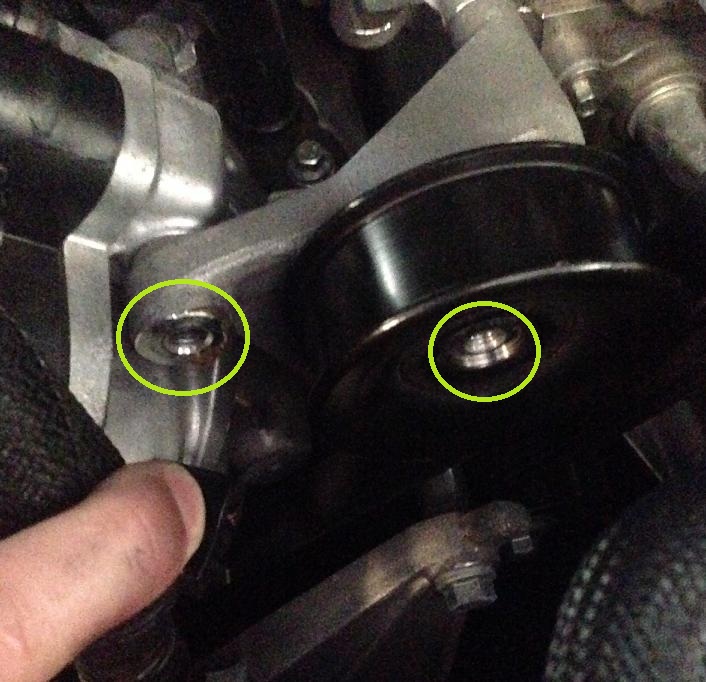
Step 4:
Line up the belt with the pulley and install the last bolt and spacer.
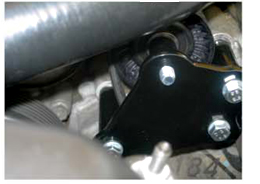
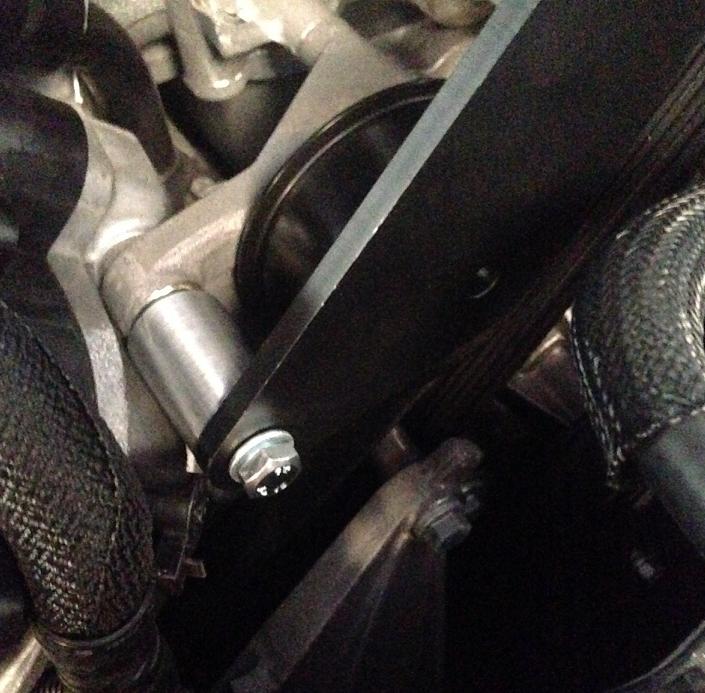
Step 5:
Snug up the bolts and pull the bracket up and to the left so that it lines up the pulley and belt. Once everything is lined up, tighten the three bolts. Put the belt back on by pulling the tensioner up and slipping the belt back over the smooth pulley.

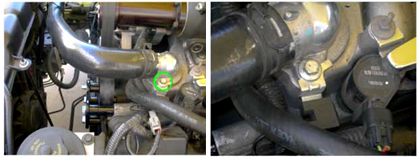
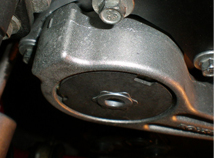
Step 6:
Remove the bolt from the thermostat housing and install the piece from Step 1.
After the bracket is mounted, the belt should be in the middle, to the backside of the pulley.
On some Series IV’s the belt may not line up in the middle of the pulley. To make it line up you will need to use the enclosed washers.
If you have any problems with the installation of your MoSaleen™ Idler Pulley System, please contact Scott Van Hoose by phone at (417)825-1498 or by email at svanhoose57@hotmail.com.
Important Amendment for 2002 Saleens
If your Saleen is a 2002, I will need to know what size bolt to include with your system. Ford changed their bolt size on April 15th, 2002 from a 10mm to an 8mm bolt. The bolt is located on the driver’s side and has a stud sticking out of it, next to the valve cover. Pull it out to determine if it is a 10mm or 8mm threaded bolt before calling to place your order.
If you have already ordered the system, you will need to remove the stud and the bolt to be sure they are the same size.
Once the plastic piece is loose you should go ahead and relocate it to the thermostat housing. Remove the bolt on the thermostat housing and mount the plastic piece.
If you have any problems with the installation of your MoSaleen™ Idler Pulley System, please contact Scott Van Hoose by phone at (417)825-1498 or by email at svanhoose57@hotmail.com.
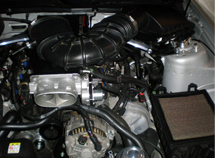
Installation Instructions for 05-09 Saleens
NOTE: You will need to provide a smaller belt for this system. Purchase one that is 1-2 sizes smaller than the one you are using with your stock pulley system.
Step 1:
Remove the air filter cover and CAI tube
Step 2:
Remove the drive belt and alternator.
Step 3:
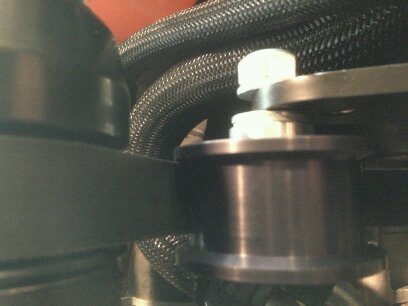
Pull off the stock idler pulley (located just to the left of the S/C pulley) and put on the provided spacer.

Step 4:
Take all three bolts out of the tensioner, remove it and pull off the stock pulley…
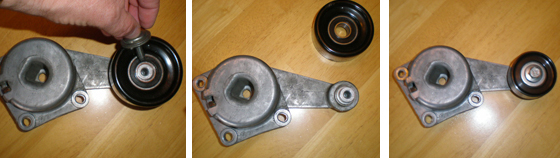
Step 5:
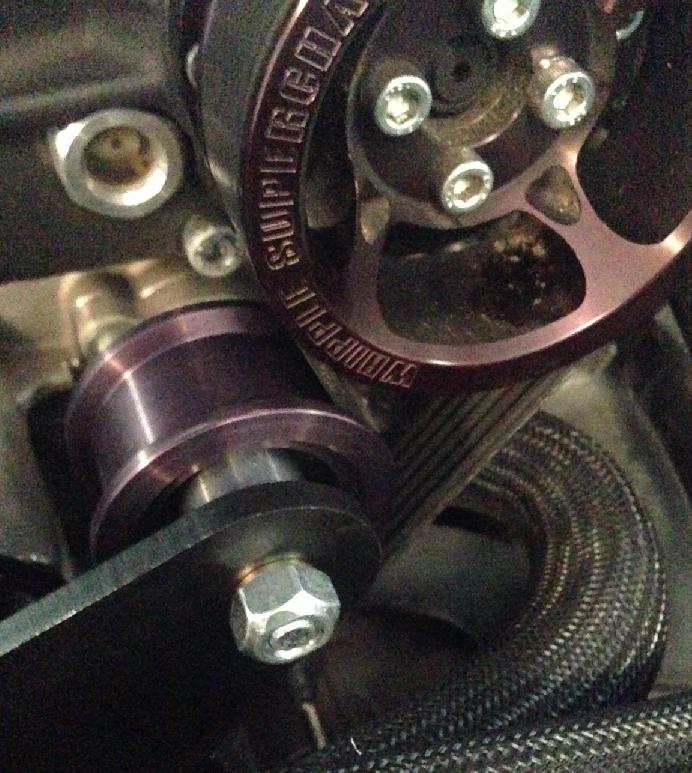
Install the pulley provided with your new system onto the tensioner. First loosen the stock tensioner pulley bolt. Remove the stock tensioner pulley and replace it with the new pulley provided with your MoSaleen system.
Step 6:
Reinstall the tensioner by putting all three bolts in. Only tighten the one to the far left.
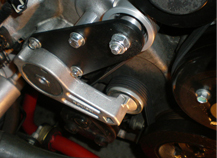
Step 7:
Take out the other two bolts and place the idler pulley bracket on top of the tensioner with
the pulley facing the engine.
Step 8:
With the bolt holes lined up, you will install the two bolts you pulled out of the tensioner. The third provided bolt goes through the bracket/spacer. Make sure that both washers are on the outside of the bracket. Tighten up the two tensioner bolts first and then tighten the bracket/spacer bolt.
Step 9:
Reinstall the shorter drive belt, which is 1″ to 1.25″ shorter than you have on now. Reinstall the alternator.
NOTE: When installing the shorter drive belt, put the belt on all of the pulleys except the smooth water pump pulley. Push the tensioner all the way down with a 1/2″ ratchet and then slide the belt over the smooth water pump pulley last.
Step 10:
Reinstall the air filter cover and CAI tube.
If you have any problems with the installation of your MoSaleen™ Idler Pulley System, please contact Scott Van Hoose by phone at (417)825-1498 or by email at svanhoose57@hotmail.com.
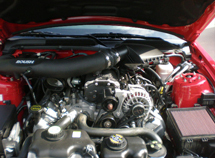
Installation Instructions for Roush Mustangs
Step 1:
Remove the air filter cover and CAI tube.
Step 2:
Remove the drive belt.
Step 3:
Pull off the stock idler pulley (located just to the left of the water pump pulley and just above the tensioner) and put on the provided spacer. The pulley you removed will replace the small idler pulley just below the S/C pulley.
Step 4:
Take all three bolts out of the tensioner, remove it and pull off the stock pulley…

Step 5:
Install the pulley provided with your new system onto the tensioner. First loosen the stock tensioner pulley bolt. Remove the stock tensioner pulley and replace it with the new pulley provided with your MoSaleen system.

Step 6:
Reinstall the tensioner by putting all three bolts in. Only tighten the one to the far left.

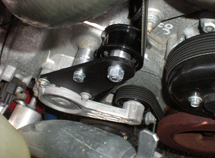
Step 7:
Take out the other two bolts and place the idler pulley bracket on top of the tensioner with
the pulley facing the engine.
Step 8:
With the bolt holes lined up, you will install the two bolts you pulled out of the tensioner. The third provided bolt goes through the bracket/spacer. Make sure that both washers are on the outside of the bracket. Tighten up the two tensioner bolts first and then tighten the bracket/spacer bolt.

Step 9:
Reinstall the drive belt.
NOTE: When installing the drive belt, put the belt on all of the pulleys except the smooth water pump pulley. Push the tensioner all the way down with a 1/2″ ratchet and then slide the belt over the smooth water pump pulley last.
Step 10:
Reinstall the air filter cover and CAI tube.

If you have any problems with the installation of your MoSaleen™ Idler Pulley System, please contact Scott Van Hoose by phone at (417)825-1498 or by email at svanhoose57@hotmail.com.
Installation for Roush / Ford Racing Supercharged Mustangs 2011 & up
Step 1:
Place breaker bar into stock tensioner.
Take bolt out of the idler pulley and the one to the left of it out.
Step 2:
Place the far left spacer and plate then install this bolt. Hand tighten so the plate will move.
Step 3:
While the left bolt is loose, install the right bolt spacer. While pushing the breaker bar down install the right bolt.

Step 4:
Tighten up the bolts

Step 5:
Now release the breaker bar.